If you’re new to recording, or just want to make sure you’re getting the best sound possible from your accordion, there are a few things you can do to set yourself up for success.
In this article, I will give you a general idea of what you need for getting great recordings of your accordion at home so that you can sound like a pro! Once you’ll be familiar with your equipment and software, you will be well on your way to creating high-quality accordion recordings. With some practice and attention to detail, you will be able to produce recordings that sound professional and polished.
Challenges of Recording an Accordion at Home
There are several challenges that come with recording accordion at home. One of the biggest challenges is finding a quiet, well-lit space in which to record. Noise from outside or from other appliances in the house can make it difficult to get a clear, high-quality recording. This is true of miking all instruments but in addition to the room, there are some specific recording challenges that are accordion specific.
- The instrument produces sound from both sides. This means that you will have to carefully place the microphone in order to get a good recording of both sides.
- The accordion has a wide range of notes, which can make it difficult to capture all of the different tones and frequencies with one microphone.
- Due to the accordion being in constant motion, it can be challenging to capture clean, consistent sound.
Setting Up Your Home Studio
Before you start recording, make sure that your recording environment has these essential components and you have everything under control:
Knowing Your Accordion
The best scenario would be to play and record an accordion in perfect condition, an instrument whose mechanical parts make no noise, whose reeds work as they should. In reality, this is not always the case.
Accordions are often quite old and if they have not been serviced, it is likely that the felt pads that are supposed to muffle the noise of the keys have been flattened out, losing their elasticity, and therefore they do not muffle the noise at all. Other times there is a reed that sounds bad, or the left wrist strap makes a noise every time the bellows of the accordion is reversed, or the leather straps begin to squeak.
Knowing all the noises your accordion produces, is essential to preventing them during recording or softening them with some editing later.
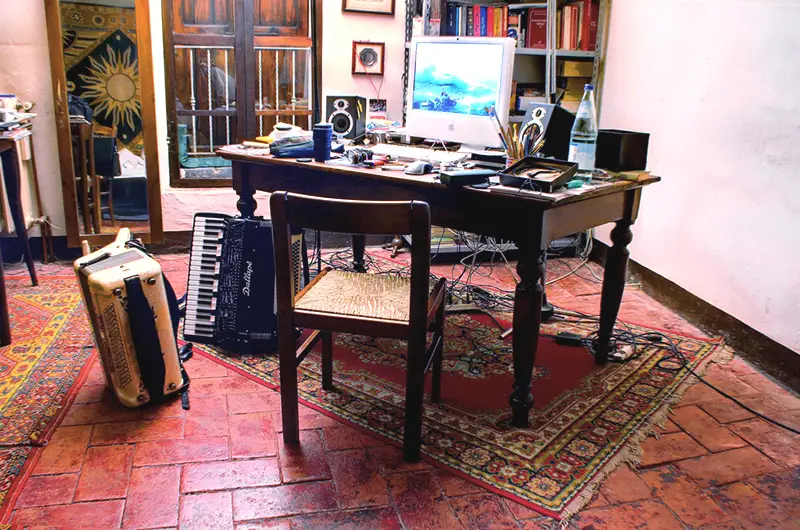
A good chair
Unless you play standing it is of absolute importance to pay attention to any noises produced by the chair or stool on which you sit. These are details that we are not used to noticing while playing normally but a creaking chair could compromise your best track and therefore it would be better to avoid such a risk.
Use a cushion and place a mat under the chair that is wide enough for your feet to rest on. Try to attenuate or eliminate any unwanted noise before you start recording.
Good acoustics
The room where you set up your home studio should be well-ventilated and relatively soundproof, so as not to interfere with the quality of your recordings. Try to find a room that is free from any background noise or other distractions, so you can focus on the recording process.
According to Dan at Sound Check Music Blog, when setting up the acoustics of your room it is important to cut down on both standing waves and reflections. These can cause your recordings to sound muddy or unclear. To do this you can use acoustic panels and bass traps to help absorb sound waves and reduce echo in the room.
An acoustic panel is a piece of sound-absorbent material that is placed on a wall or ceiling in order to reduce the amount of sound that reflects off of it. Bass traps are similar but are specifically designed to absorb low-frequency sound waves, which are the frequencies that are most likely to cause problems in recordings.
You can purchase acoustic panels and bass traps online or at your local music store. Do note that they are not inexpensive.
If you are on a budget, you can also try hanging curtains or tapestries around the perimeter of the room to further diffuse sound. These simple steps will make a big difference in the quality of your recordings. I have used a weighted moving blanket in the past and it worked well for absorbing the sound.
Good lighting
Lighting is another important consideration when setting up your home studio. If you have the incorrect lighting, the microphone can pick up on the sound of the lighting creating electrical interference and producing a buzzing noise in your recordings.
To avoid this, use natural lighting whenever possible or invest in quality studio lighting. This will help to create a more professional recording environment and reduce the risk of unwanted noise in your recordings.
Quality microphone
Once you have your room set up, it is time to focus on your microphone. A high-quality microphone will be one of the most important factors in how good your recordings sound. A microphone that is too low quality or cheap can add unwanted noise and interference, which can really affect the overall recording. For recording, look for a condenser microphone that has a low self-noise level and a multi-pattern large diaphragm. This will ensure that your recordings will be as clean and clear as possible.
Scrolling down you’ll find an interesting audio comparison test of some of the best microphones for accordions.
An example of a great mic is the AKG C 414 XLS, anyway, there are also some cheaper solutions like the Zoom H2 which is a portable digital recorder itself but can be used as well as a microphone. The quality of the recordings is incredible for such a low price of equipment.
I recorded Paolo Gandolfi playing his Excelsior accordion at the Church of Santa Maria Assunta (Bibbiano) in 2013. The track you hear in this video was recorded with a Zoom H2 placed about one meter from the accordionist, in the middle of the church nave (natural reverb, no editing, no compression, no equalization).
Nowadays even some smartphones have good microphones and can be used to record your accordion tracks. The quality of audio tracks recorded by a smartphone could surprise you. Since we all have a smartphone, it costs nothing to try.
Quality recording equipment
Once you have chosen a mic(s) you will need a sound card to connect your mic to your computer. I recommend a pre-amp or interface that has the ability to receive multiple inputs at once, such as the Focusrite Scarlett 2i2 USB Recording Interface or any other sound card with phantom power required for a condenser microphone and at least two recording channels.
Once you have set up your room and chosen quality equipment for recording, be sure to test your recordings in various different environments before you start recording. You can use headphones or a small speaker to check how they sound and make adjustments as necessary to ensure that the best results are achieved.
Recording software

Audio Editors
There are many good options available, so do some research and choose the one that is right for you. I recommend Pro Tools but you can use FL Studio, Reaper, Cubase, Sonar, Garage Band, or Logic as well. For simple projects, you could even use a free open source multi-track editor like Audacity.
Once you have chosen your recording software, be sure to learn how to use all of its features. This will help you to get the most out of your recordings and produce the best possible results.
You can also shape the sound of your accordion recordings using a variety of plugins. These include equalizers that can adjust the sound frequencies, compressors to smooth out your recordings and reverb plugins or effects to replicate an acoustic environment.
Plugins
Equalizer
An equalizer is a very powerful tool that can be used to change the sound of your recordings. If you are not happy with the overall sound of your recording, you can use an equalizer to boost or reduce certain frequencies. This can help to create a more balanced recording.
I suggest cutting the lowest bass sub-frequencies ( <60-80Hz) to get a clean recording of your accordion, some portion of the frequency spectrum is filled just with noise.
Compressor
A compressor is another essential tool for shaping the sound of your recordings. It can be used to even out the levels of your recordings so that the loudest and quietest parts are closer in volume. This can help to make your recordings sound more professional and polished.
In general, you shouldn’t overdo the compressor, unless you want exactly that result. An overly compressed accordion sounds flat and lacks any dynamic range.
Reverb
Reverb is an effect that can be added to your recordings to create a sense of space. By adding reverb to your accordion, you can make it sound as if it is being played in a much larger room, or outdoors. This can help to create a more full-bodied and professional sound.
Recording an Accordion

Microphone Setup
There are several options for miking an accordion:
- The simplest is to use a single microphone placed in front of the accordionist at a distance that allows both sides of the accordion to be recorded.
- With 2 microphones, you can arrange them so each mic records a separate track for the right hand and one for the left. The problem is that, while you’re playing, the left side of the accordion is constantly moving so some accordionists prefer to mount a lavalier microphone somewhere near the bass button board.
- You can also use multiple microphones, for example, 2 mics on the right side and one mic for the bass side, this way you’ll get a good recording level along with all the keys.
Single microphone setup
To get a good recording of both sides of the accordion, you will need to carefully place your microphone. This might involve moving the mic closer to one side or the other, or even repositioning yourself and the instrument in order to get a better angle on the sound waves coming from each side.
When placing your mic, make sure that there is a clear path for the sound to travel, and avoid blocking either side with your hand or other objects. The ideal placement is usually between one to two feet from the accordion. Use this as your starting point and adjust the distance as needed.
Remember that the closer the microphone is placed to the instrument, the more sound waves will be captured directly from the side of the instrument where the microphone is placed.
Multiple microphones setup
If you have multiple microphones available, you can use them to capture both sides of the accordion. For example, you could place one mic closer to the treble side of the instrument to capture all of the high notes, and another closer to the bass side to pick up the lower tones.
Consider using condenser microphones for this purpose, as these are typically better at capturing a wide range of frequencies.
Note: Your accordion may have internal microphones, so you may want to experiment with turning these on as well. I have found a quality external mic will usually provide a better overall sound.
Here is an interesting video from David Lange where he samples some of the best microphones for miking both sides of an accordion:
- ATM 35 3:45
- Sennheiser MT-04N 4:17
- ATM 35 & MT-04N 4:47
- DPA 4060 6:03
- B&K 4011 & Sennheiser MKH 50 13:19
- KSM 141 15:38
- KSM 141 at Grill 16:28
- Royer 121 17:34
- B&K 4011 & AKG 414 (parallel to grill) 18:53
- B&K 4011 & AKG 414 (perpendicular to grill) 19:27
(I suggest subscribing to David Lange’s channel. His videos are full of precious tips for intermediate and advanced accordionists.)
Playing in Time
It is important to play in time when recording a multitrack project. This means keeping a consistent tempo and playing each note at the correct time.
One way to help with this is to use a metronome when recording. This will help you keep track of the beat and ensure that you are playing notes at the right time. Ideally, you should use closed-back headphones so that the click of your metronome won’t be loud enough to be recorded on your track.
Probably the best option is to use the metronome of your audio editor software. You can also set different beats depending on the style of music you are recording.
This will help you adjust your playing and ensure that the recording is clean and consistent but it will also allow you to add multiple tracks in perfect sync.
Post-Processing
Once you have captured your recordings, you may want to consider adding some additional effects in post-processing. This can help to enhance your sound and make it more polished. For example, you might use compression or EQ to balance out the different tones and frequencies in your recordings.
Conclusion
Overall, recording accordion at home can be a great way to capture high-quality audio and showcase your playing skills. With some careful preparation and the right techniques, you can produce great-sounding recordings that you can be proud of. Thanks for reading!
Have any additional tips or advice on how to sound like a pro when recording accordion at home? Share them in the comments below!
*AccordionChords is affiliated with ThomannMusic.com. If you click on a link to ThomannMusic.com and make a purchase, I may earn a commission. This commission helps keep our website running and allows us to provide valuable content. Thank you for your support!